Using data from the Internet is easier than ever, if you’re an aspiring, amateur, or professional programmer. Open standards such as XML, JSON, Webservices, and REST, allow common tools in a programmer’s platform to access data. The trade off is information exchange. You have to register your personal information, to get a registration key. And in some cases, you have to risk paying for usage, such as when you use Google’s API’s.
Google Cloud is a Pay Service, but…
Google’s API billing policy is extremely generous, if somewhat unpredictably clear sometimes. When I first signed up, it was $200 free services per month. Sometimes as I view my API’s usage in their dashboard console, the billing will reflect I only have $100 free services that month. This month I have $300 free services this month. For personal usage, you will rarely use over $100, but it is possible. I’ve programmed bugs, that requested so much data, and I left it neglected and unmonitored that it ran up $400 that month. So I advising keeping a window open, monitoring your Google API usage.
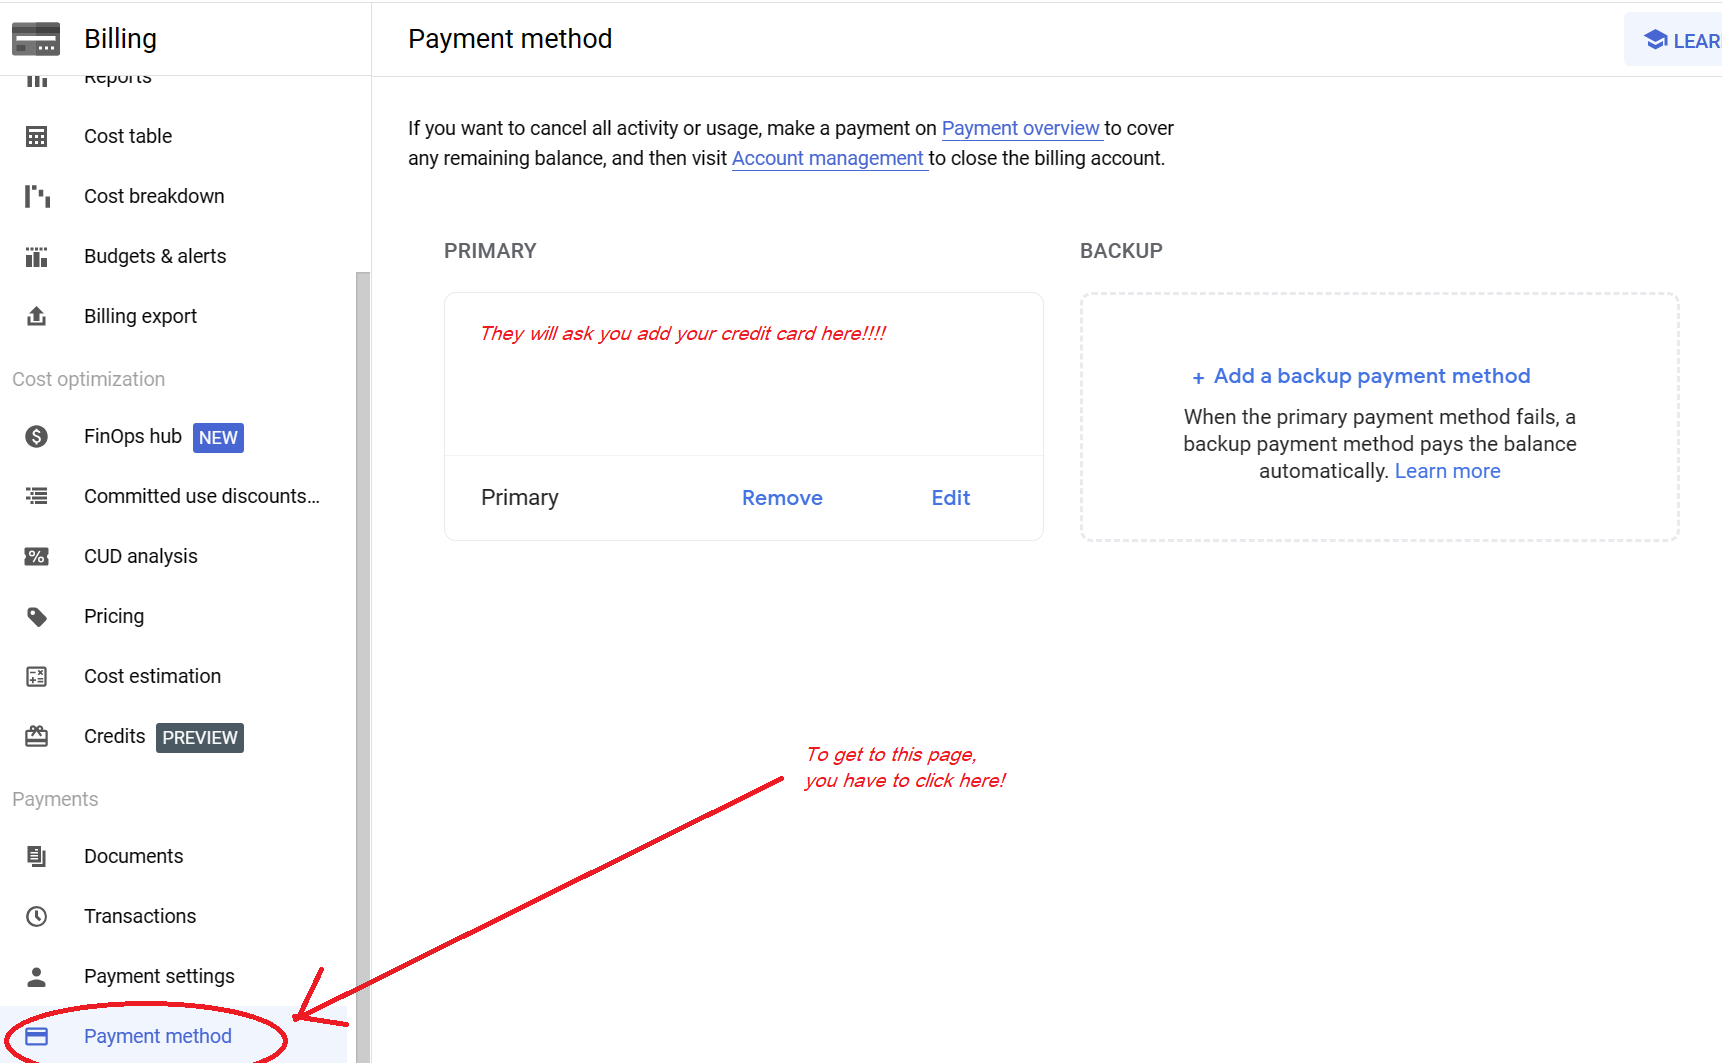
Now that you know that their billing and discounts are extremely generous for trials, you should know, you have to add a credit card to your account, if you go over the discount amount. You will be charged automatically at end of month, if you exceed the free usage discount.
But you do need to give Google your credit card information, to use their API services.
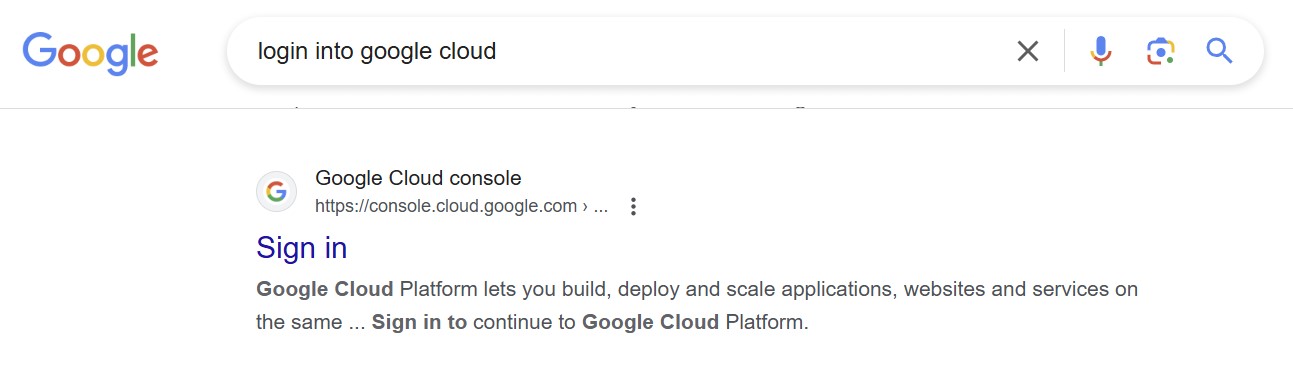
You have to login with your Google account (if you have a Gmail account, use that. If you don’t have Google account, create one):
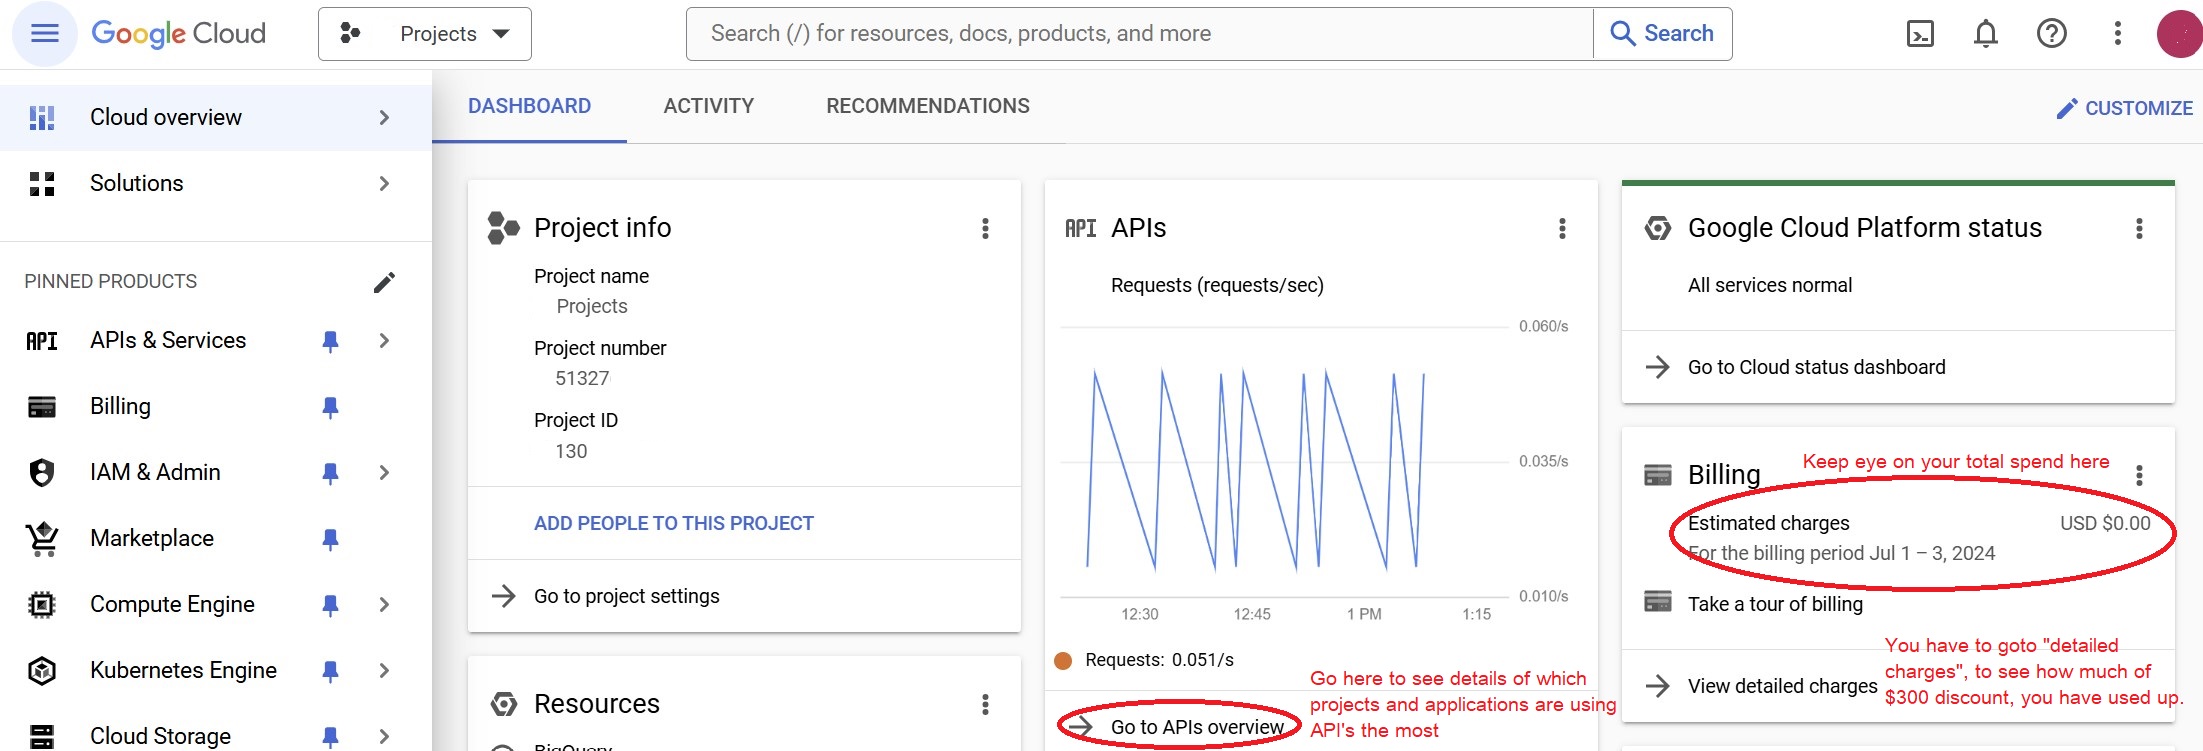
Once logged in, you can Search for “Billing”. The Billing screen will how much they charge you, for the aggregate services you used.
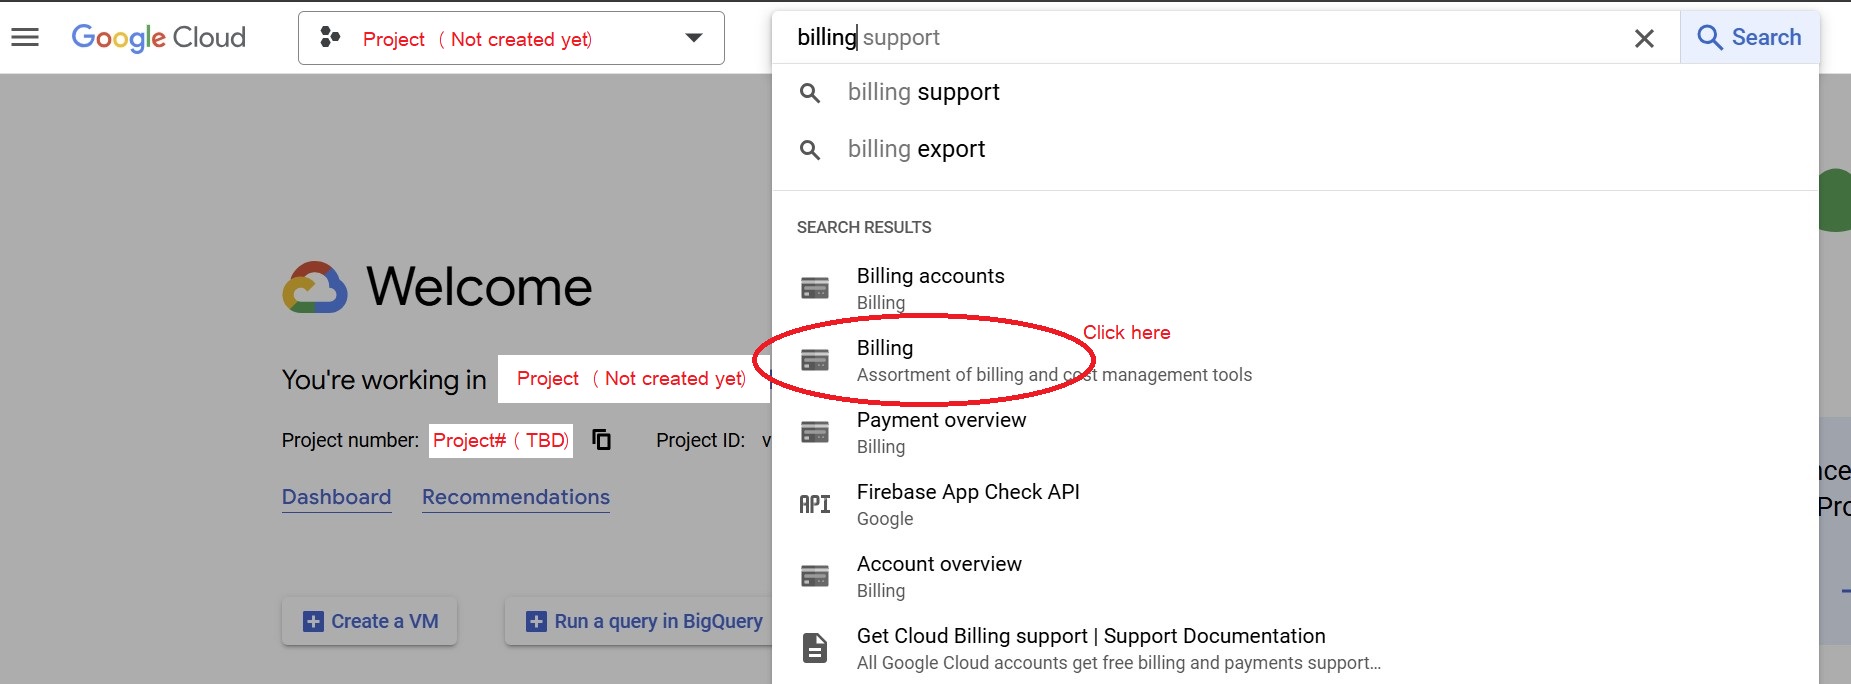
Below is menu item for the Billing screen, and the screen itself after you have clicked it.
Not all free data API services on Internet require billing account, but Google does. OpenWeather for instance, just requires your personal information to get a API key for weather forecast information. Google is a business, and I suspect they want you to take your Googling skills to your job, where the business will exceed the free tier (and gladly pay for).
How your Usage of Google Cloud is Organized
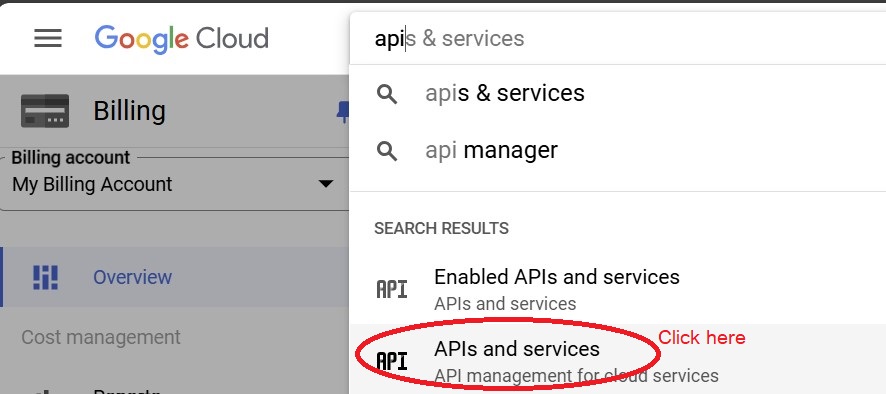
Now that you have sold your personal information, and credit card to Google, have comfort that you still have your soul, for now. And let’s move on to the next step, which is creating a Project. You can return to main Google Cloud dashboard and click the button “API and services” to create projects, enable APIs, and get your API keys.
You can create 25 projects, which is how Google allows you to subdivide your applications. Inside each project, you can create multiple API keys. This allows you to monitor Google API usage per application, by creating separate API keys for each application. Or you can be reckless, and create one key, and have all your applications have same key. Don’t be reckless.
Create your first project in Google.
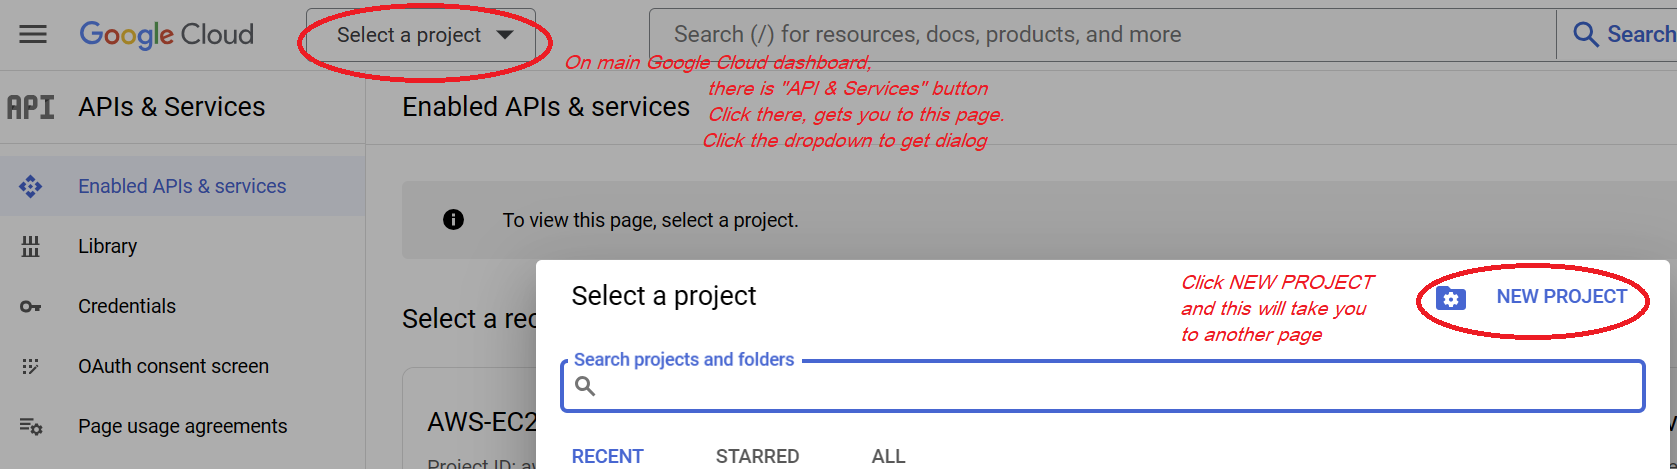
Each project in Google, has only certain API enabled for it. By default, few are enabled. So you have to goto the “Enabled API and Services” tab on left side.
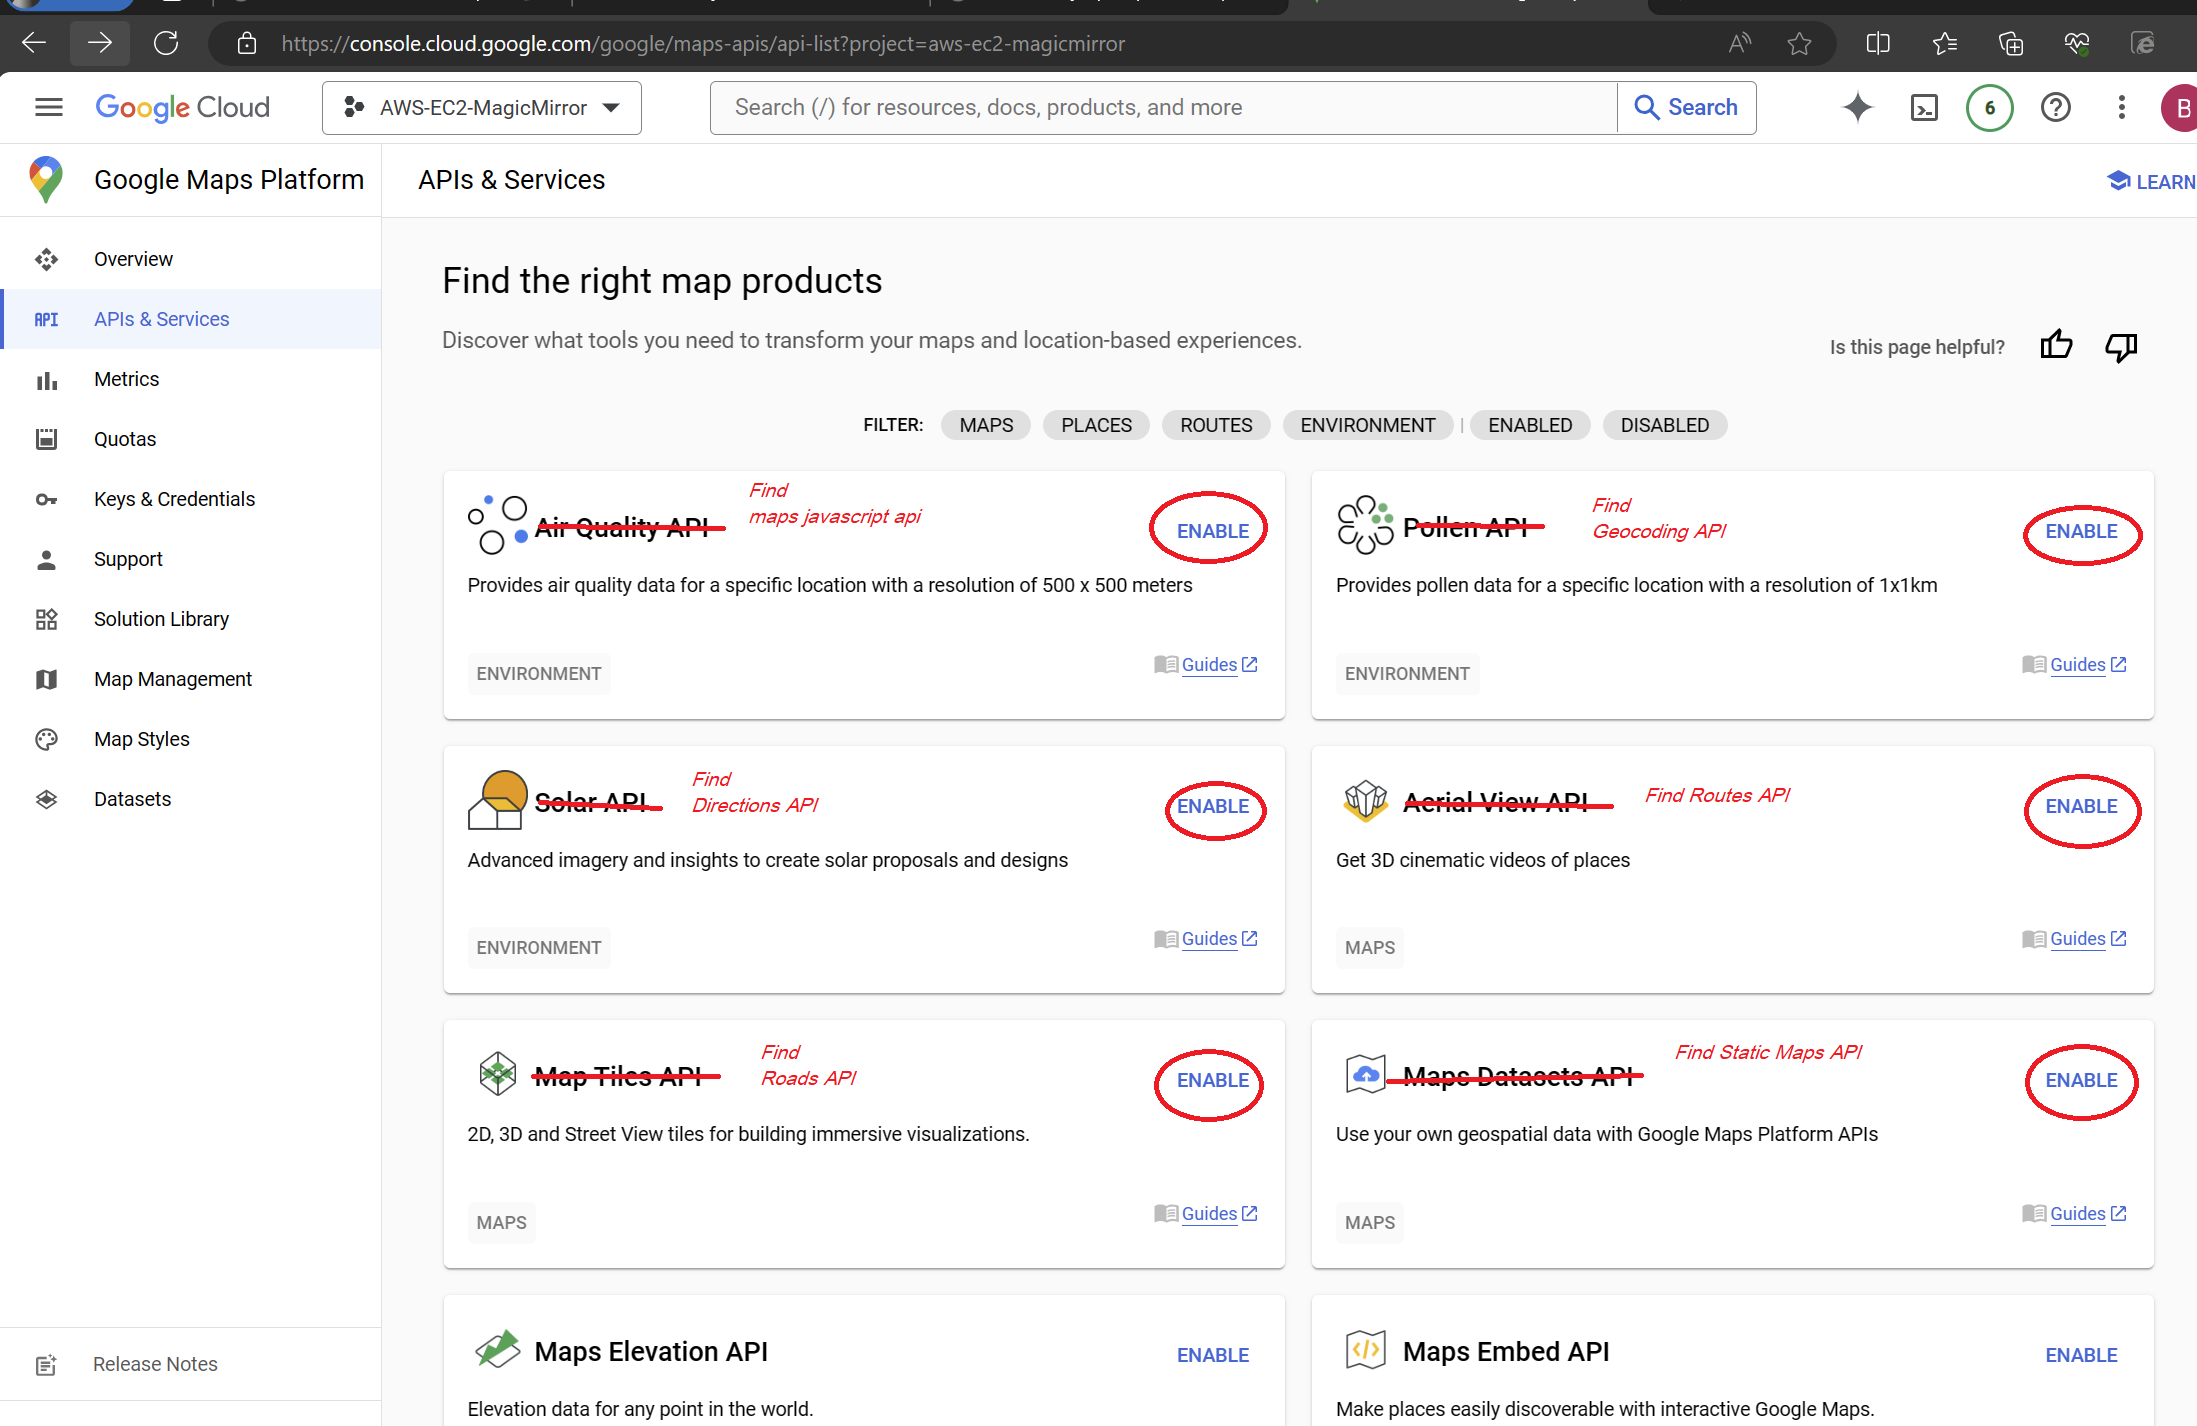
Then there is a button on top of the page with “+” next to it called “+ Enable API and Services”. On that page, find the API you want to use, and press “Enable button”.
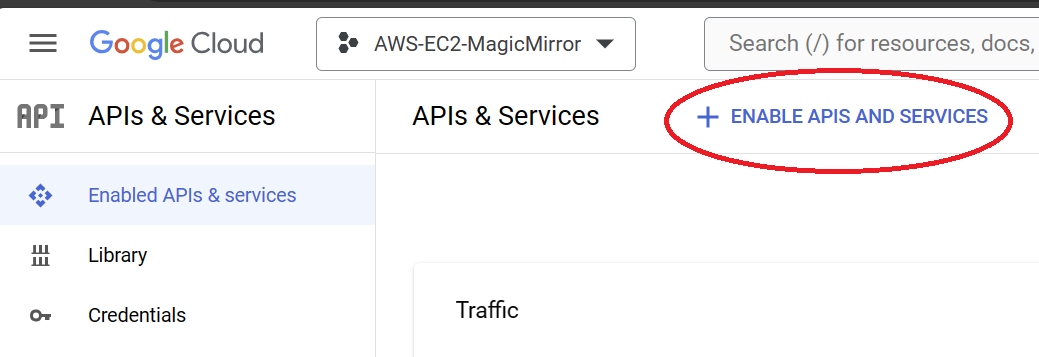
There are different views for the below screen, depending on from which referrer page linked to it. So just find a enable button next to your API name, and click it.
After enabling a API for your project, you need to create the API key. You will have to do this, with every new project. I keep getting deja vu “Didn’t I do this already”. Yes, a year later, when you create another project, you will wonder, and yes you did, you did enable the API, but for another project.
Create a API key
The API Key is the password, you will send Google Cloud, every time you ask it for data. You can assign several API, to one key, as my example will ask you to do. And anytime you request data from one of those API, if you do not send the API KEY, it will return an error.
An API KEY belong to a project. You may create multiple API keys for this project. You may create another project and assign API keys there. You can have same API, assigned to different keys. Secondarily the projects and keys, give you a way to track usage of Google API from different applications.
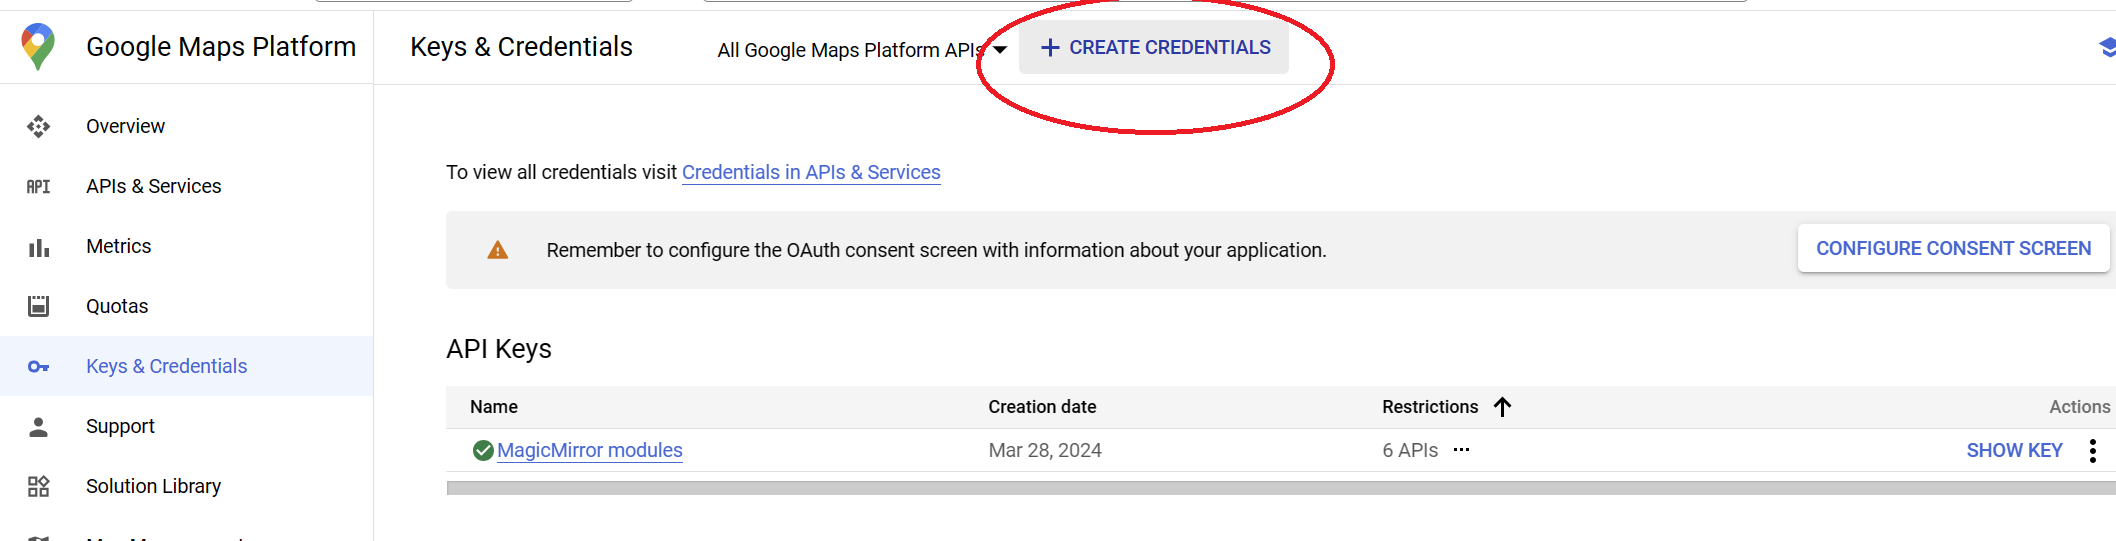
Below is where you can find the “Keys and Credentials” screen. If you are in the “API & Service” screen, you should be able to find the “Keys and Credentials” (might be just Credentials now) menu on left side. Click the button indicated in the image below, and you should see a new row named “Api key(?)”. I advise that you give the key a descriptive name, like which application will be using it, ie. “MagicMirror GPS Map module”.
Now you have your API key. Copy it somewhere, but you can come back and get it at any time (unlike security keys for different other services that you only get that 1 chance to copy it and store it somewhere securely, like AWS secret keys, or github login keys)
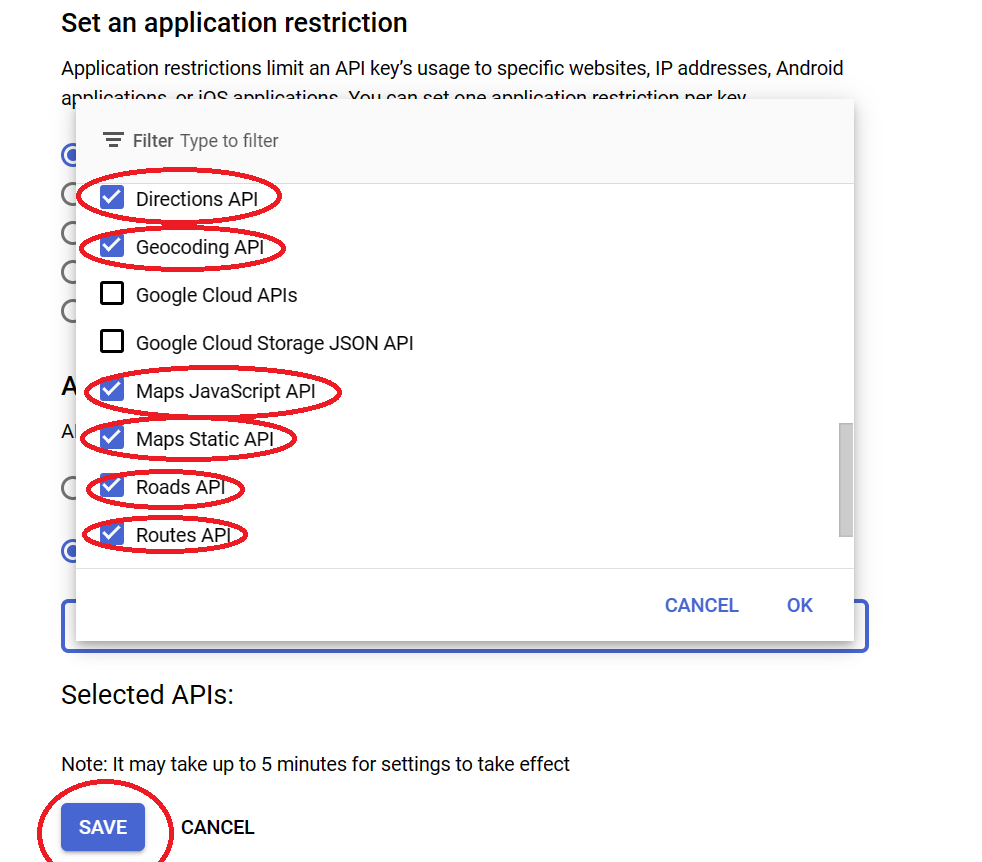
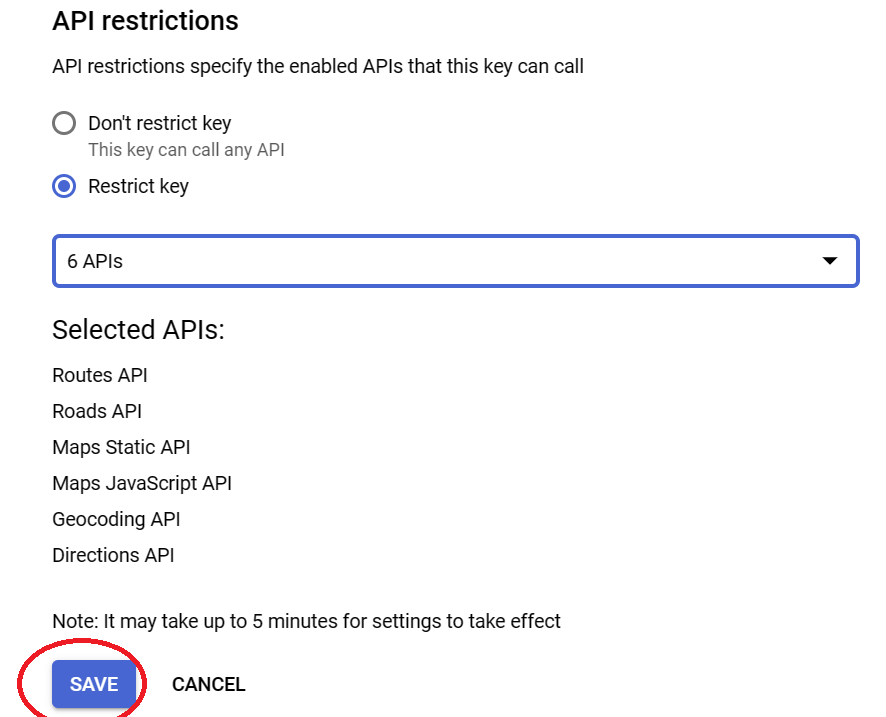
You might see a warning that this API key is unrestricted. There are several ways to add additional security for the usage of this API key. I will only show one, restricting the API key to only be able to access certain API. Clicking on the key, brings you to a screen which allows you to add additional security. Goto the restricted API, and click dropdown. It should only have API’s that you have enabled in the previous step. Check off all API’s you want to be able to access. Save.
Using your Google API Key
Now, when you want to tryout one of the Google Cloud API, you can replace everywhere their examples say “API_KEY” with the one’s you copied in previous step. Most (but not all, the routing API uses POST) Google API, you can test the URL in your browser. Here is an easy example for getting coordinates of an address using Google Geocoding. That page has a URL, you can cut and paste into a browser. Ie.
https://maps.googleapis.com/maps/api/geocode/json?address=1600+Amphitheatre+Parkway,+Mountain+View,+CA&key=YOUR_API_KEY
This URL can be used in any language or application that allows you to make HTTP requests, like Javascript. Javascript in a HTML page, using XmlHttpRequest, can get data from Google (Google implements CORS, which will allow or restrict your access, from your HTML page).
Monitoring Google API Usage
This is important, if you ever plan to keep your project running continuously. You have to keep an eye on the cost. There is no mechanism that Google built in to their platform, to stop the service, once your discount has been all used up. They will bill you at end of month, for any extra service you requested. View the usage here:
https://console.cloud.google.com/home/dashboard
The easiest parts to understand on the screen is the dollars, and usage chart:
There is an mechanism to send an alert e-mail, but if your e-mail is like mine, that is the worst place for something that requires timely attention to go.
Some of my projects
Good luck. This is just a tutorial of what to do, if you see an instruction “Get a API KEY from Google”.
PS.
I have 2x MagicMirror modules in my Github, that have installation instructions, to get Google API keys.
And a Web map project, written in python.