It’s not that big of a deal. They take 24 to 48 hours to set up an account. Then, if you follow the instructions in this person’s blog, you paste some javascript in the <head> tag and in less than 3 days, you’ll start having ads appearing in the whitespaces of your webpage.
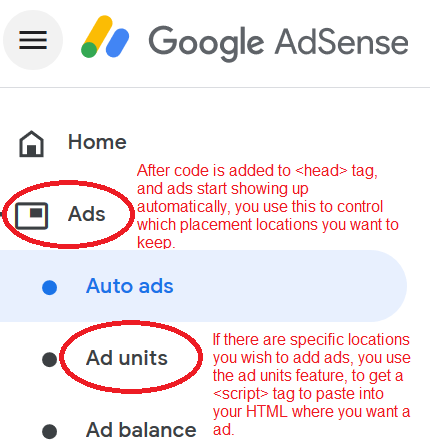
We will describe Auto Ads which is the default kind, and Ad units. The link provided above, tells you how to get started with Google Adsense, which is to register and then paste code into your HTML template to have Google start injecting ads into it in a few days.
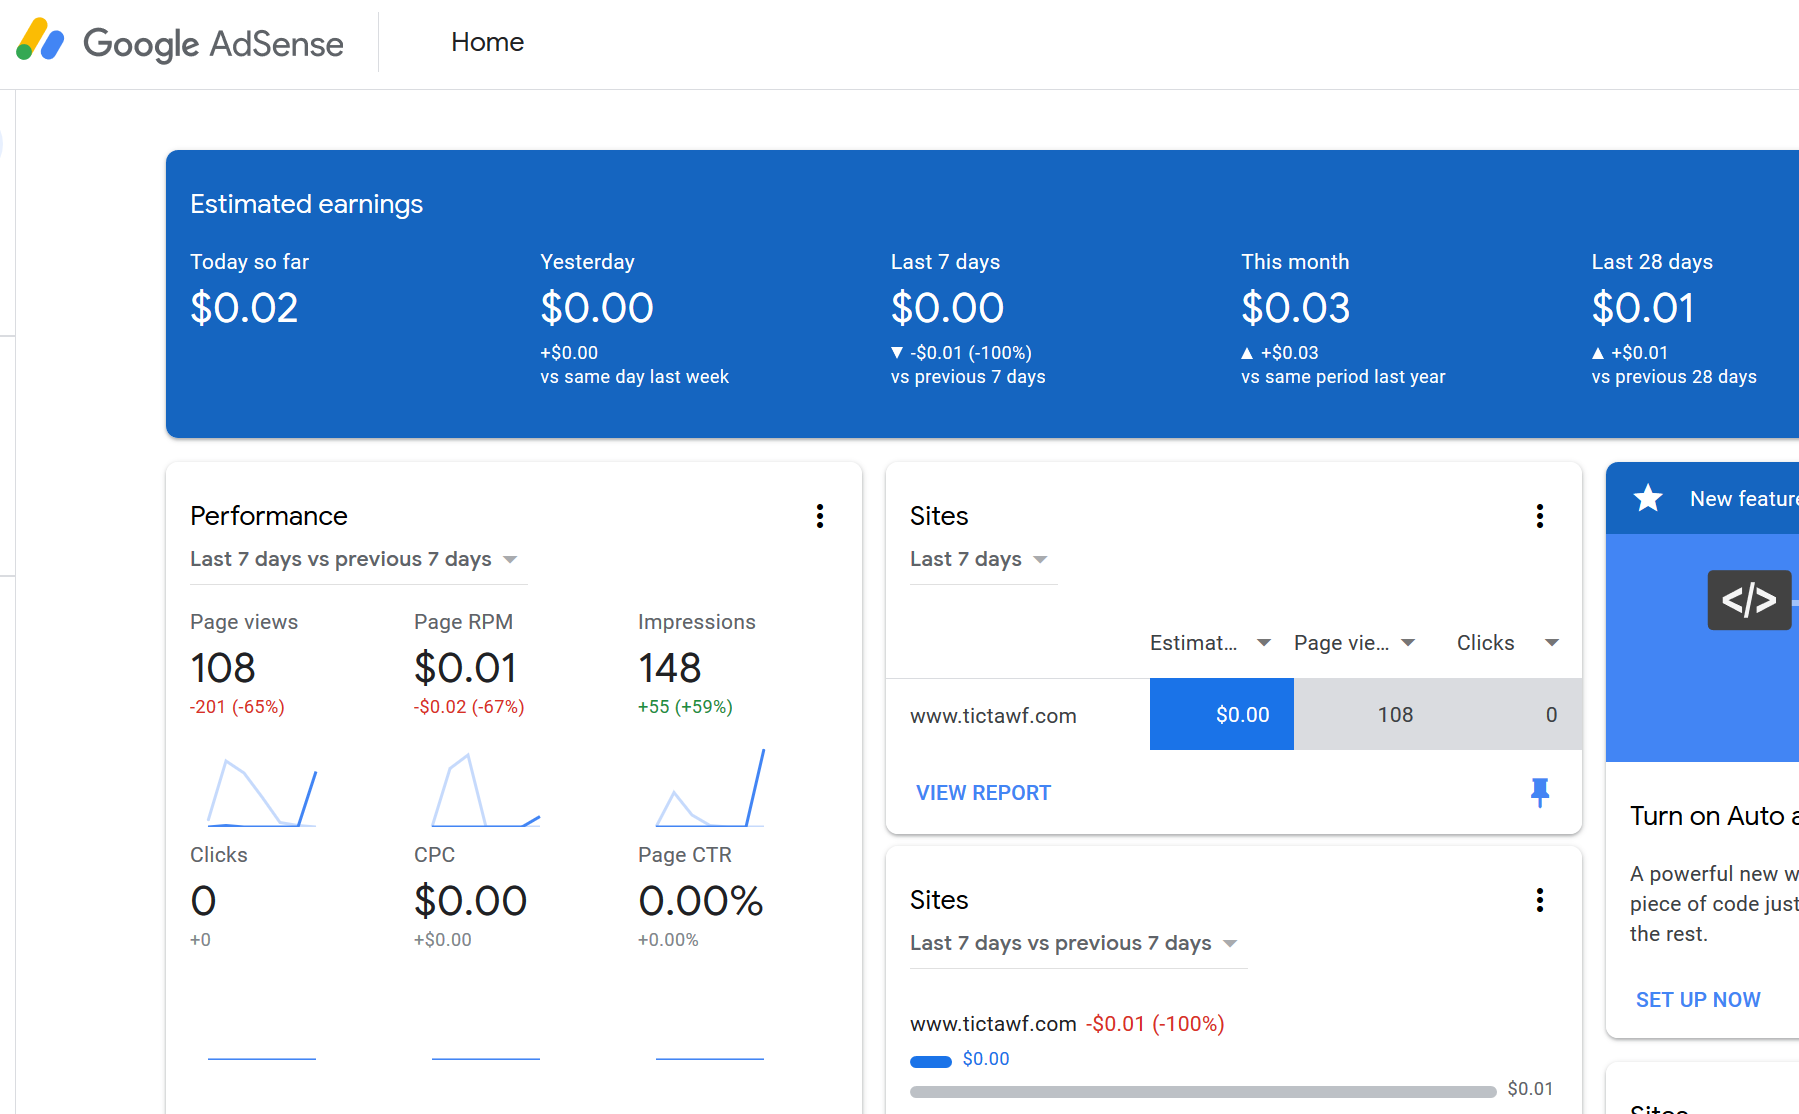
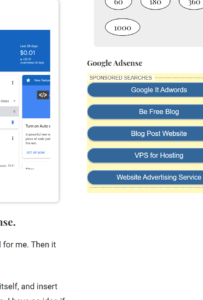
We not making any real amount of money using this, so we’re going to skip the dashboard. I’ll just include a single view of it, below. You can go to a search engine specialist, to increase your views. I’m doing this blog to impress my resume readers.
Eventually, we will go over controlling some of the more arguably disruptive ads that AdSense injects, in the control panel. And then we will show you how to use Ad Units to control specifically which places you want ads, by putting code inside the HTML element you want ads in.
Addendum 2019-4-16. A week with Google AdSense.
It took a while before real ads started showing up personalized for me. Then it got creepy. It showed me an ad for my VPS provider in a week.
It looks like the AdSesnse service looks for empty whitespace itself, and insert the ads there, thru inserting elements in the javascript Dom tree. I have no idea if they got a human being to do this, by looking for identifying tags in the Browser debuggers, and flagging the specific httpreferrers before returning the ad.
Addendum 2019-4-29. After seeing Frommers.com with Google Adsense.
I hated it. The site was one of my favorites because it was easy to find the information I was looking for, and I always look for the Walking tours in 1,2 or 3 days and the Frommer’s favorite experiences. It’s touristy, but I’m a tourist.
Well, my favorite sections are now injected with ads, nearly indistinguisaable from the content and articles. No block intenting or anything else to separate it, until you’re reading about botox, right after nightclubbing. So I am removing the in-article ads from this blog.
How to remove the in-article ads
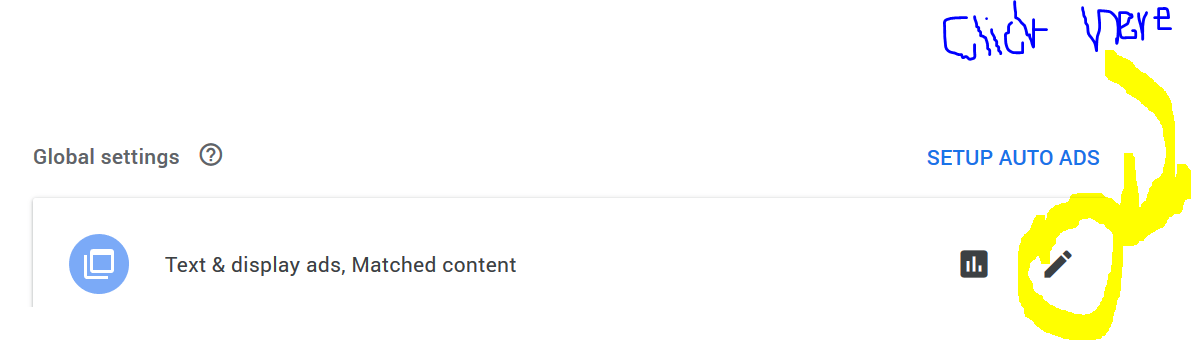
There are options in Google Adsense Console, to turn the feature off. I also turned off the feature that adds ads in between search listings, though it wasn’t as jolting an experience. First, goto the menu and Select “Ads”, which should take you to Auto Ads control panel.
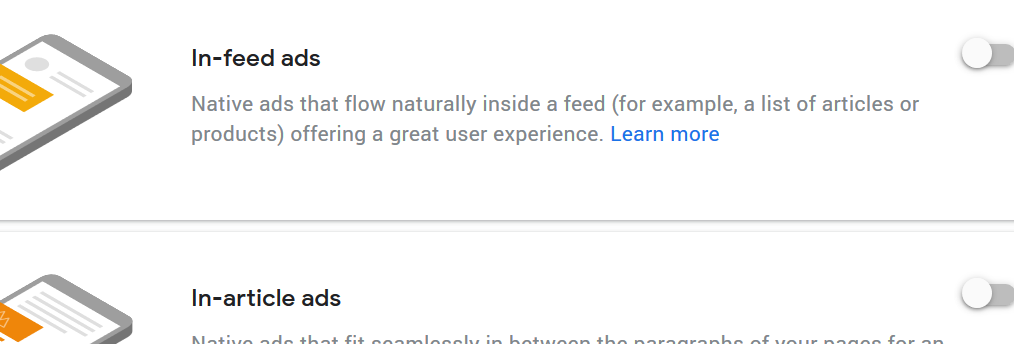
Click the “Pencil”, which is to edit global settings for Auto ads. And switch off “In-article Ads”, though I also turned off “In-feed ads”.
Then click the off-switches for “in-article ads”.
How to place an ad in a WordPress Widget
Adsense automatically places banner ads, footer ads, in-article ads, and in-feed ads, when you added the code to the
tag. You can control this in the dashboard settings specified in the prior section.But what if you want to place ads in a specific location in your website layout or template? Using Ad units, you can specify the exact place where you want to place an ad, in your HTML. Here, we will show an example on how to do it,on a WordPress Sidebar Widget, to show ads in the WordPress Sidebar, which most WordPress templates leave a huge amount of unused whitespace.
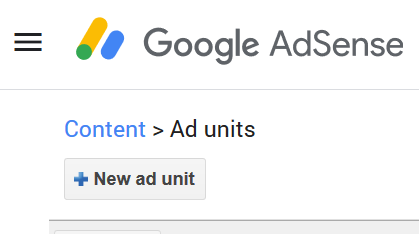
First, there are some directions to go over. We will illustrate it for the picturebook crowd. We have to first create an ad unit in Google Ad-sense’s dashboard. Goto the menu for “Ad-units”, under the “Ads”. This will open up a screen with this button
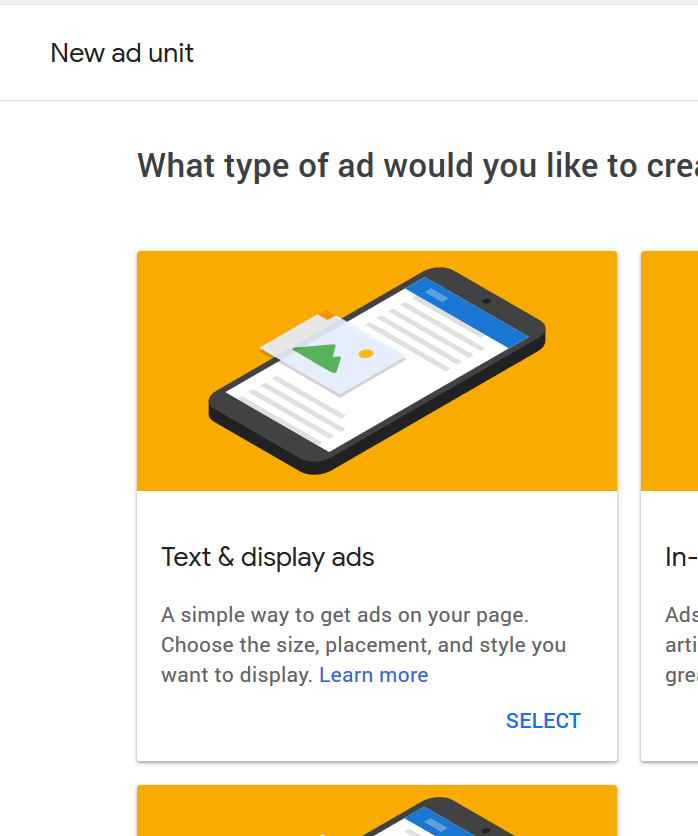
This opens up a new screen, where you get to select a type of add, on which platform. We choose the “Text and Display Ads”.
This gets you to a setting screen, where you get to specify what this ad’s style will look like. Pick any, b/c you can go back and change it later, if you don’t like it. Click “Save and get code” to get a window to open up, with a code snippet to copy.
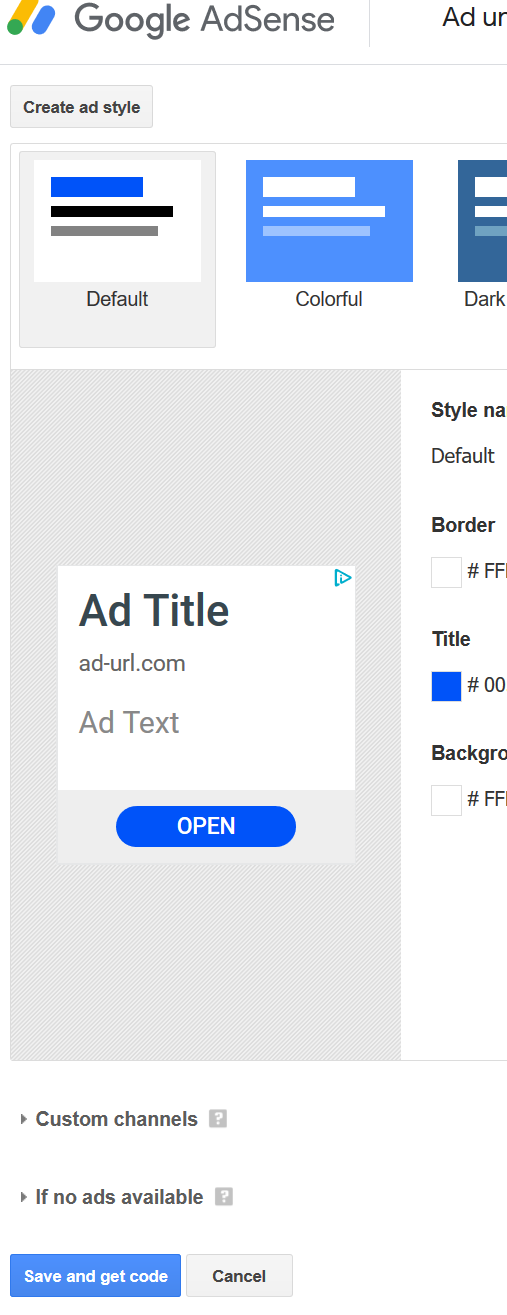
The window with the code snippet, looks like this:

Copy that piece of code. And you are done with Google Adsense. You can close the Adsense dashboard website.
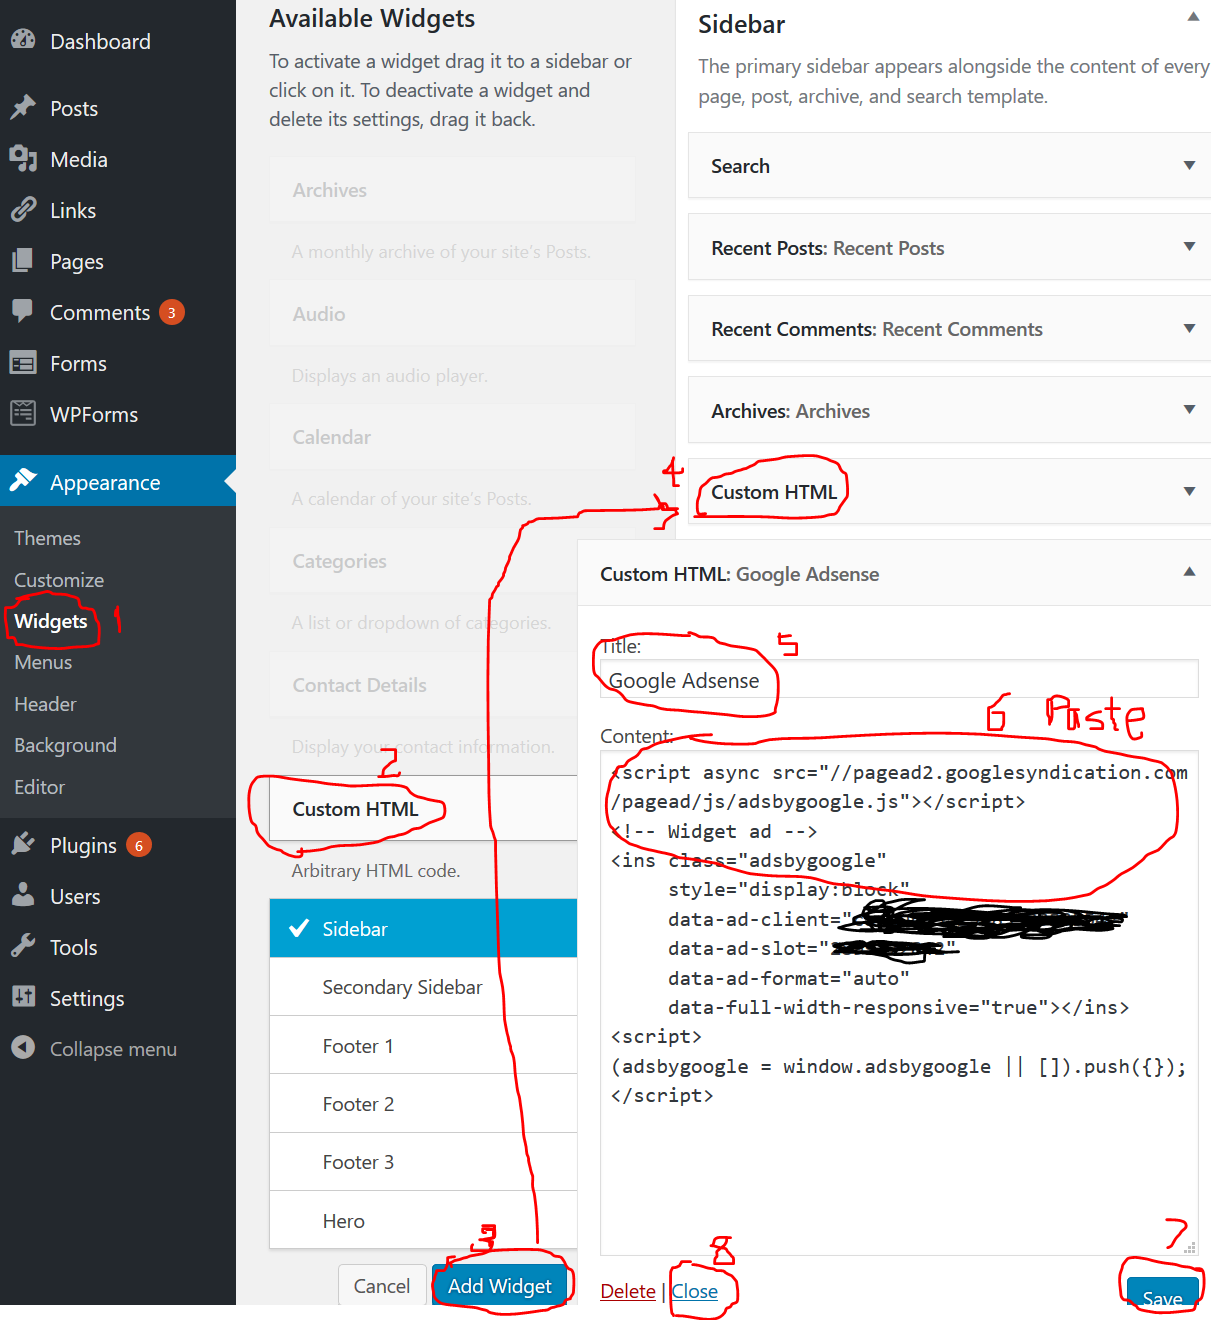
Now you need to login into WordPress, and I hope you have a rudimentary understanding of WordPress’s admin console. Goto “Appearance > Widgets” in menu. Go under “Available Widgets” and find “Custom HTML” and make sure sidebar is checked. Click “Add Widget”. This will add “Custom HTML” to the bottom of the “Sidebar” section. If you wish to make it clear to your reader that the content below is an ad, you can do what I do, and give the Custom HTML Widget a title “Google Adsense” to display to everyone. Paste the code you copied from Google Adsense’s Ad unit page into “Content”. Click “Save”. Click “Close”.
Now view your blog pages. If it normally has a right sidebar, you will see one with ads now, under the title you specified.
Don’t spend those few cents you get, on one place. 🙂